|
Paper designs and products
|
|
|
| Blog | BOM | Custom | Design |
| Garage | OSARM | Repair | Smörg |
|
||||||||
|
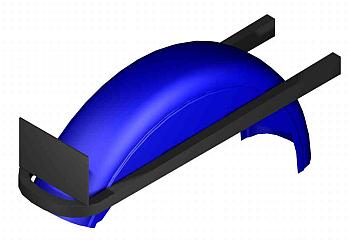
Iron Sportster design
|
 |
||||
  |
 Ironhead design starts with any information you can get from the factory manual. Harley gives detailed frame dimensions so we can fix the bikes after a crash.  Based on those dimensions you can draw up the frame pretty well, and in this case, use it to figure out how to mount the 7-Amp-hour battery in the front down low by the motor mounts. I used this same drawing to figure out that the VW 15-degree 4-cyinder engine would fit in a Sportster frame. I'll get it posted and link to it this later this year. |
|
| |
 CAD (computer-aided-design) drawings are great, but you can figure out a lot with a 25-cent Bic pen and a piece of graph paper as well. Here I studied an oil-cooled Sportster.  But where CAD really pays off is when you take that 2-D drawing and use it as a template to make a 3-D drawing. Now you can fit things and see how they will work. The tubes have all those lines because it was made way back in the AutoCAD days, probably AutoCAD 11. I have since switched to Solidworks. |
|
| |
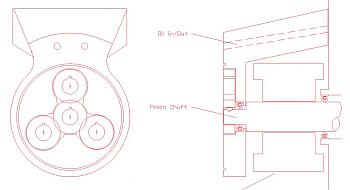
 With the frame reproduced in the computer, I then could see if a 60-degree high-cam engine would fit. It looks pretty close. With the frame reproduced in the computer, I then could see if a 60-degree high-cam engine would fit. It looks pretty close. And the same 3-D computer stuff helps figuring out that very same high-cam engine. You can see I made the engine more like a car engine, with two valves side-by-side. It was the 3-D drawing that got me to realize I could make the rocker boxes into one piece. This might be a fun project but it is such a huge effort to make a 60-degree engine, much less one that drives a high cam, I put this one on the shelf for now. |
|
| |
 Sometimes Sportster design is using hot-wax adhesive to save a loose mirror. Sometimes Sportster design is using hot-wax adhesive to save a loose mirror. Design is also building things and making sure parts don't clank together. Design is also building things and making sure parts don't clank together. And design is not just paper, you have to ride the heck out of your bike(s) to see what breaks. And design is not just paper, you have to ride the heck out of your bike(s) to see what breaks. |
|
| |
 When I got tired of the Sprocket cover on my 1977 Sporty breaking, I sketched up a steel bracket that would mount to the rear engine mount studs. When I got tired of the Sprocket cover on my 1977 Sporty breaking, I sketched up a steel bracket that would mount to the rear engine mount studs. Years later, a 3-D sketch made things much more presentable. Years later, a 3-D sketch made things much more presentable. |
|
| |
 Years after that I switched to Solidworks and things really started to look good. This was a study where I modeled a 9/16 deep-well socket taking out the stud nuts. I could see the thick wire was going to get in the way. It anchors the return spring. This is the great thing about 3-D CAD. It takes forever to draw things up, but once you do, you can find mistakes before you make the part, not after. You know the saying, "Experience is a mean teacher, it gives you the lesson after it gives you the test." This is why it is critical to have the frame, tools, rider, and the all the other stuff modeled in the computer. |
|
| |
 So without having to scrap a weldment, I could sit and look at the screen and try to figure out the cleanest way to provide clear access to the stud nuts and still anchor the return spring. The inspiration came with the realization that the kickstarter return spring can go on 4 different ways. I know, I learned the hard way putting it on 90-degrees off, only to have to remove the kicker lever to reposition it. So with the spring rotated on the shaft, one of the flanges can be extended and it is a much cleaner design with one less weld to worry about breaking. |
|
| |
 Solidworks helped me design a headlamp bracket for my 1996 Evo.  It fit the first time. It fit the first time. And looks pretty clean, should you want to mount a Bates headlamp to a 1996. And looks pretty clean, should you want to mount a Bates headlamp to a 1996. |
|
| |
 Not everything has to be draw on paper. I got tired of filling my 2-gallon gas tank on that 1977 Sporty, my daily driver. So I got the aftermarket weld-on mount kit meant to restore chopped big-bike frames.  I was reluctant to weld on my frame. I splatter more than I weld. Just sitting next to the bike and playing with the mount, I realized I could weld side-plates to the aftermarket mount, and then bolt the whole thing to the frame. Another principle of design is having something to start with. I disliked the Shovelhead tanks since I had to bash the insides to get them to fit. Later I bought the aftermarket kit to adapt flat-side tanks. |
|
| |
 Since you don't need CAD or a computer to draw on paper, its easy to draw things up. I have scanned all these documents so they are in the computer.  Here I wonder if extending the cam bearings will keep the shaft from wearing. Once documents are scanned its easy to share them, like I am doing now. |
|
| |
 Where CAD really helps is the layout of things, and to see if they will fit. This is an old sketch where I tried to put a shock where the battery and oil bag usually is. It is fun to sketch things like this, but it still is imprecise.  But after a few years on Solidworks, I was able to "build" an Iron Sportster engine to see how I could hack on it. Without a case you can learn a lot. The cam gears and transmission gears are out in the open and you can see exactly how things line up and where things will fit if you hack on them. I will start putting these CAD models up on this site this year, so everyone can play with them. An educational version of Solidworks is 120 bucks. |
|
| |
 Even with all the CAD, it still can be nice to doodle on a piece of paper. This carb study is to see if you could make it so narrow it will fit inside the air cleaner.  Even if I used CAD, this clutch release ramp to operate the front brake would have not worked very well. I think I still have the hacked-up caliper, or at least a picture. I will look for it. Even if I used CAD, this clutch release ramp to operate the front brake would have not worked very well. I think I still have the hacked-up caliper, or at least a picture. I will look for it. |
|
| |
 For wiring, its essential to draw things up so you see what goes where. This was my figuring out the wiring on my 1977 Sporty. Anyone that has seen a factory wiring diagram knows it may be correct, but it is not very helpful.  Once you have the schematic, the scheme of things, you can make a wire harness, and a helpful diagram to show where it goes. That is the headache with the factory wiring diagram and all automotive wiring diagrams. They are not a schematic, and they are not a layout. They are trying to do both so they do both poorly. I never thought I would understand the mess of wires on my 1996 Sport. It took a day or two, but I finally untangled it. |
|
| |
 This diagram is not done, all the connectors are supposed to have the location on them. This is a schematic. It shows the scheme of the wiring, not where it goes or what goes into what connector. That is for other documentation. Thing is, you often need the scheme of things to figure out what is wrong, or how you might want to improve things. I never understood how my 1996 Sport canceled its turn signals until I drew this diagram. Then I saw there is a wire from the speedometer to the turn signal box. Ohhh, I see, the box looks for the speed to go back up after the turn, and cancels the signals. Now I get it. |
|
| |
The Chassis assembly
|
 |
|||||||||||||
  |
|
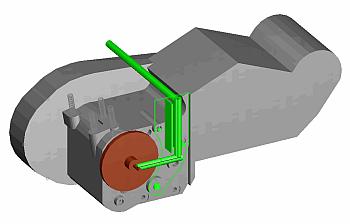
The Engine assembly
|
|
||||||||||||||||||||||||||||||||||||||||
| |
|
Assemblies |
|
| |